


How To Paint A House: A Step-By-Step Guide
4-Minute ReadUPDATED: March 11, 2022
Painting your own house is a simple project that will completely transform your home. But you don’t need to paint like a professional to revitalize the look of your home. Given the right care and prep work, you can beautify your home yourself! Follow these steps to make your painting project a success.
Gather Your Tools And Supplies
With a big endeavor like painting your house, taking inventory of what you’ll need to complete the job is a necessary first step. You may not need some tools as much as others, but one you will need is a ladder. How tall of a ladder you’ll certainly need depends on the size of your house. With the right ladder, you’ll be able to properly clean, seal, repair, prime and paint your home.
Cleaning Tools And Supplies
Cleaning your home before painting is essential to ensure your paint sticks. If you have a smaller home, using a bucket with warm water and a sponge is a great option. However, if you’re in a larger home, a pressure washer will make the job a lot easier. Here are a few other tools and supplies to get the job done:
- Paint scraper
- Sandpaper or an orbital sander
- Drop cloths or plastic sheets
- Detergent or bleach
- Respirator mask
Sealing And Repair Supplies
If it’s been a while since you painted your house or if your home is older, there’s a possibility you’ll need to repair it. Whether it’s rotting wood or chipped brick, a repair is necessary before painting. You’ll also need to caulk between your exterior and trim, windows and doors. Here’s what you’ll need to seal and repair your home:
- Putty knife
- Caulk made for your exterior type (metal, wood, masonry, vinyl)
- Caulk gun
- Wood filler for patching damaged wood
- Mortar for repairing mortar in brick walls
Primer, Paint And Painting Tools
Depending on your exterior, you may or may not need primer. For wood siding or unpainted aluminum siding, primer is necessary. If you’re painting brick or stucco, look for specific primers for filling-in and adhering to those surfaces. Primer fills in the gaps and provides a clean slate to paint on.
You also need to choose the right paint for the job. Each exterior surface, whether it’s vinyl siding or brick, has different paint made for it. For instance, a high-quality acrylic will work best with vinyl siding, but you need to stay away from dark colors. Dark colors absorb heat and will cause your vinyl siding to warp and buckle. You may have multiple surface types on your home, such as aluminum siding with wood trim. You’ll need the right paint and primer for each surface you want to paint.
Determine how much paint you’ll need by measuring the painting surface with a tape measurer. Paint absorbs differently depending on the surface. The average coverage per can of paint is 350 square feet. If you’re covering a porous surface like stucco, you’ll need almost twice as much paint.
Besides paint and primer, here are a few extra tools you’ll need:
- Drop cloths or plastic sheets
- Stiff bristle brush
- Paint rollers
- Paint tray
- Plenty of rags
- 6-in-1 painter’s tool
Prep Your House
How good your paint job turns out has a lot to do with the surface. A clean, even surface is easier to paint, and your paint job is more likely to stand the test of time. Take these steps to prep your house:
Survey Your House
Before you reach for your scraper and power washer, you need to know what you’re working with. Give your house a thorough look-over, making note of areas with peeling paint, old caulking and rotting wood or chipped brick. If you find rotting wood beneath your gutters, make sure your gutters are clean and aren’t damaged.
Scrape And Clean
The biggest step of this project is scraping off the old paint. Stuff that’s blistering or peeling needs to go. For most surfaces, a paint scraper and some elbow grease will do the job. For wood siding and trim, you may need to sand it down to get the paint off.
After the old, damaged paint gets removed, it’s time to wash your house. Choose a cleaner made for your exterior. For smaller homes, cleaner in a bucket with a sponge will remove most dirt and mildew.
You can pressure wash your house exterior, but be careful. Pressure that’s too high will damage your exterior. Aluminum siding and brick mortar are susceptible to this damage. If your pressure washer has a detergent tank, you can add some cleaner to make your washing more effective.
Apply any soap starting at the bottom and working your way up to avoid streaking. Once you’re done washing, rinse from top to bottom to make sure you remove all the cleaner.
Caulk And Repair
After scraping and cleaning your house, you’ll probably be aware of all the little blemishes it has. Maybe there’s some peeling caulk or chipped brick. Now is the perfect time to repair and weatherproof your home. It can be a little confusing to determine what you should and should not caulk. Here are a few examples of where you should caulk:
- Corners
- Trim board joints
- Wood around windows
- Trim around garage door
- Gaps and cracks in siding or mortar
Sealing can be a little addictive, but there are places you must avoid getting silly with the sealant. Why? You might trap water or discourage drainage, causing problems with mildew and rot. What should not be caulked:
- Trim that sits on top of siding
- Wood to metal joints
- Behind gutters
- Trim at the bottom of siding
Once you have your house weatherproofed, consider the areas you can repair. Some repairs are more essential than others. If you have rotting wood that needs replacing, you may need to call a professional carpenter. Likewise, with crumbling mortar and brick, you may need to call a contractor. Small cracks or chipping may be filled in with wood filler. Other repairs may be cosmetic, such as dented aluminum siding. You can replace the siding or hope that a fresh coat of nonglossy paint will cover up the damage.
Time To Paint!
Now is the time you’ve been waiting for. You finished all the prep work and it’s time to lay the paint. Put on your best pair of painter pants and get ready to add a fresh coat.
Lay Down Drop Cloths, Prime And Tape Off
Before you go slapping paint up, take the time to protect your home. Lay down plastic sheets or drop cloths to protect landscaping. With plastic sheets and painter’s tape, cover windows, doors and exterior fixtures you don’t want paint to drip on.
Next you’ll need to add primer. Not all areas may need to priming. For example, if the bulk of your house is painted aluminum siding with very little peeling, you won’t need to prime. Wood siding and trim, brick and stucco all need primer for the paint to stick.
If you’re painting more than one color, tape off the trim and any areas you don’t want to accidentally paint the wrong color. How much tape you use depends on how skillful you are with a brush, or how quick you are to clean up after yourself. Unless you’re a professional, it’s best to err on the side of caution
Paint Exterior
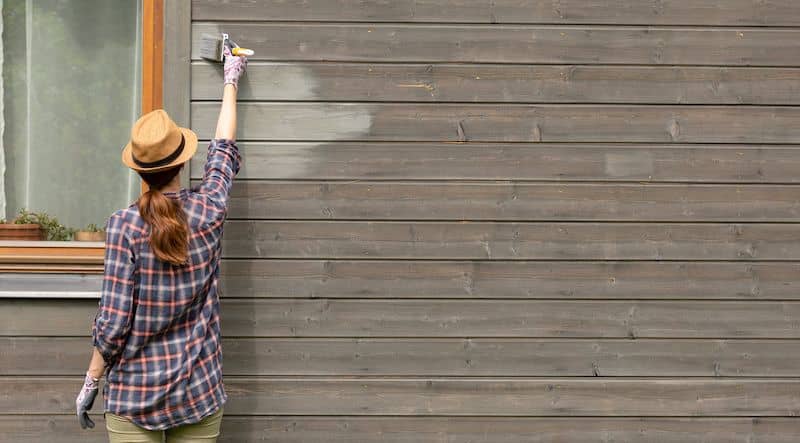
Stir up your paint, pour it in a tray or bucket and get going. Work in sections, starting at the top and working your way down. With a brush, paint along any indentations in the surface. For siding, this is where the pieces overlap. On brick, paint out the mortar first. Cut in – or paint an outline – around windows, doors and trim with your brush.
Use your roller for the bulk work. Roll the direction of your siding. Apply your paint with a steady roll on, then smooth it out with a second roll, rolling off into the wet edge. Work down the exterior and around what you’ve already cut in.
Once you’ve finished painting your first coat, you will probably need another. A second coat will even out your color. Consult your paint’s information on dry time needed between coats. Most paint needs 8 to 12 hours before adding a second coat.
Paint Trim, Windows And Doors
After you’ve painted the bulk of your exterior, now it’s time paint the detail work. Most people choose to paint their trim, windows and doors a different color than the rest of the house. Contrasting light and dark colors, or bright and neutral colors, is a great way to beautify your house and make it stand out. Carefully brush on your paint, wiping up any misplaced paint or dripping with a damp rag. Let your paint dry for 8 to 12 hours, then put on a second coat.

Enjoy Your Handiwork
Once you’ve wrapped up painting, you can sit back and marvel at the work you’ve done. Painting a house is a simple project, but it takes time and effort. Take pride in what you’ve accomplished. You’ve updated your home by scraping the old paint from it, cleaning it, repairing any damage and putting on new paint.
Your home identity is now tied to the work you put into making it look good. Not only is your freshly painted home more attractive to the neighborhood, but by following these steps and painting your home right, you’ve increased its value – all for a fraction of the cost of paying someone else to do it.
For more home improvement ideas and financial savings tips, visit our Learning Center.
Apply For A Personal Loan.
Working On A Home Project?
Use a personal loan to finance exactly what's needed for turning your house into a home.
See My OffersRelated Resources
Viewing 1 - 3 of 3